
← All technical articles · News
Industry Insights
Front Suspension Rebuild: When to Replace Control Arms, Ball Joints and Bushings
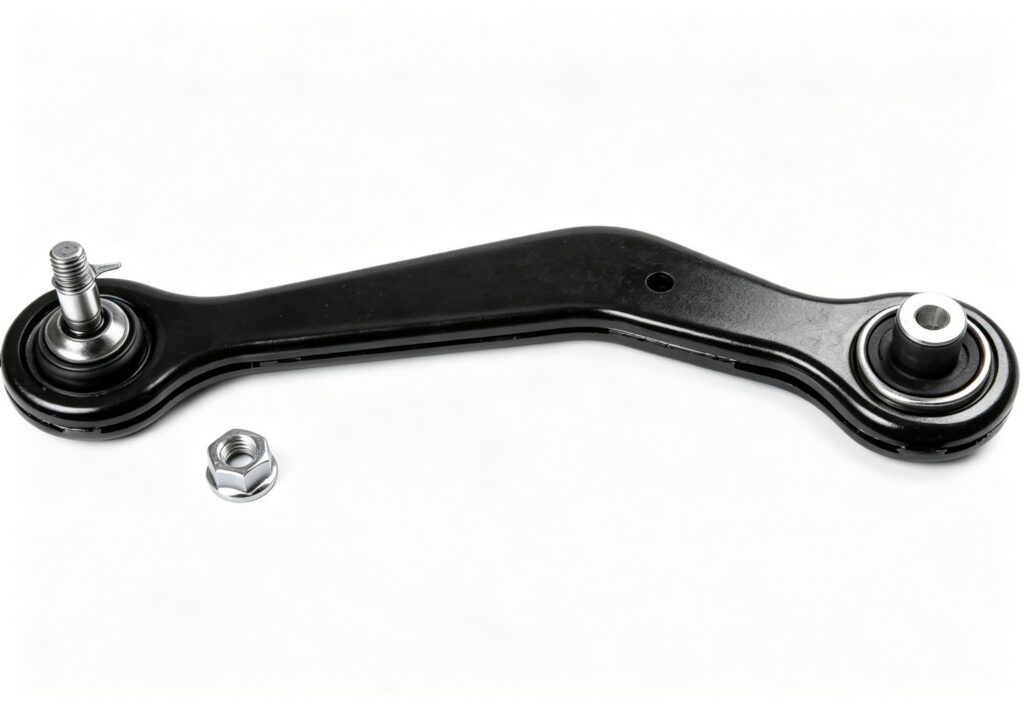
Front-end work is usually decided in the wrong order. A driver reports a clunk, the workshop quotes a whole corner, and the question of whether the car needed a rebuild at all never gets asked. The cost of that shortcut is paid twice: once by the owner, and again by the distributor when the same corner comes back. The decision reduces to three tests — measured play against the OEM limit, the condition of the rubber, and evidence that the geometry has already moved. When two of the three fail on the same corner, replacing the arm as an assembly is normally cheaper than pressing new parts into a housing that is already worn.
Quick reference: three tests, three outcomes
| Test | What you measure | Published threshold examples | What it decides |
|---|---|---|---|
| Play at the ball stud | Radial and axial movement with the suspension loaded or hanging, exactly as the service manual specifies; breakaway torque on the stud | 0.2 mm total backlash fails the lower arm (NHTSA technical bulletin) [2]; about 1 mm play and a 10 Nm breakaway check (Tesla Model Y) [1]; under 2.0 mm accepted on inspection (Mazda CX-9 campaign) [3]; over 3.0 mm rejected at annual inspection (British Columbia) [5] | Joint-only repair, but only if the arm and its bushing are sound |
| Rubber and boot condition | Crack length and depth in the boot wall, rubber-to-metal bond, bushing stiffness, corrosion inside the boot | Boot crack longer than 19 mm, or deeper than 30% of wall thickness, is a fail; a bushing that has lost 20% of its stiffness is due for replacement [1]; water or rust inside the boot condemns the joint [2] | Arm assembly, because the bushing is on the same life curve as the joint |
| Geometry evidence | Steering axis inclination side-to-side, toe, steering wheel centre, tyre wear pattern, ride height | SAI difference above 0.5° side-to-side fails inspection [5]; alignment is required whenever a locating component has been disturbed [7][8] | Diagnosis first, then alignment; a kerb strike may have bent the arm rather than worn it |
Test 1: play is a number, not a noise
A clunk over a speed bump is a symptom with several parents: a worn ball joint, a stabiliser link, a control arm bushing, a wheel bearing or a loose caliper. The only way to separate them is to measure the joint the way the vehicle manufacturer says to measure it. That instruction matters more than it sounds. Some lower ball joints are checked with the suspension hanging free; others must be checked with a jack under the lower control arm so the joint sits in its loaded position [9]. Checking the wrong way produces a false pass on a joint that is about to separate.
The thresholds above are not interchangeable. A 0.2 mm backlash limit is a service-campaign rejection criterion for one specific lower arm [2]; the 3.0 mm figure is an annual inspection condemnation limit from a regulator that has to keep older vehicles on the road [5]. Tesla publishes roughly 1 mm of permissible play together with a breakaway torque check, because a joint can feel tight by hand and still have lost its preload [1]. Mazda’s campaign accepted anything under 2.0 mm on the affected arms and replaced both sides when the limit was exceeded [3]. Quoting one number across platforms is how a workshop either replaces good parts or passes bad ones.
Two measurements are worth recording on every job: radial play, and breakaway torque. The second one catches a joint whose socket has worn but whose spring or preload is still masking the movement. Recording both, plus the method used (loaded or unloaded), turns a judgement call into a warranty file that survives a claim.
Test 2: the rubber decides whether a joint-only repair makes sense
A control arm is a locating link with two lives: the joint at one end and the bushing at the other. They age on the same curve, but only the joint announces itself. A bushing fails quietly, first as a small change in compliance, then as a change in geometry under braking, and finally as a tear that lets the arm move fore and aft. Tesla’s published criterion is explicit: a bushing that has lost 20% of its stiffness is due for replacement [1]. That number matters because a press-in joint replaced into an arm with a tired bushing produces a car that still wanders, and the comeback is logged against the part that was changed, not the one that should have been.
Boot condition is the cheapest early warning available. A cracked boot admits water and grit, the grease emulsifies, and the socket corrodes from the inside. The inspection criteria are specific rather than cosmetic: a crack longer than 19 mm, or one deeper than 30% of the boot wall, is a failure; so is rust-coloured grease weeping from the joint [1][2]. A split boot on a joint with no measurable play is a reprieve, not a pass — it is the point at which the clock starts.
Test 3: geometry evidence turns a repair into a diagnosis
If the steering wheel is off-centre, the car follows cambers, or the front tyres show feathered edges, the corner has already moved. British Columbia’s inspection standard treats a steering axis inclination difference of more than 0.5° between sides as a failure [5], and both regulators and alignment specialists treat a disturbed locating component as a trigger for a full alignment rather than an optional extra [7][8].
This test also protects the workshop from replacing the wrong part. A kerb strike bends an arm far more often than it wears one out. A bent arm can pass a play check and still put camber and caster outside spec, which is why the alignment printout belongs before the parts order, not after the invoice.
What the five-part corner actually contains
The “five-piece kit” that circulates in the aftermarket is not a marketing invention; it is the set of parts that share a service life on one corner. In practical terms:
- Control arm — the locating link, usually supplied with the bushing pressed in and, on many platforms, the ball joint already installed.
- Ball joint — separate where the arm is serviceable, integrated where it is not.
- Tie rod end — outer, and inner where the rack is accessible; the part that carries toe.
- Stabiliser link — the cheapest part on the corner and the most common source of a clunk that gets blamed on the arm.
- Strut mount and bearing — the top of the corner, where noise and steering memory usually originate.
Commercial kits follow the same logic in tiers. A stage-2 refresh kit typically bundles lower ball joints with hardware, control arm bushings, complete tie rod assemblies, upper strut mounts and the stretch bolts the manufacturer marks as one-time use [10]. Stage-3 kits add inner tie rod ends, rack boots and arms with uprated bushings already installed [10]. Brand-specific refresh kits are sold in levels that start with arms, bushings and ball joints, then add outer tie rods, end links and strut mounts [11], while vehicle-specific kits from other suppliers bundle twelve or sixteen pieces covering upper and lower arms, ball joints, inner and outer tie rods, sway bar links and rack boots [12].
| Kit tier | Typical contents | When it is the right purchase |
|---|---|---|
| Joint and link level | Ball joints, stabiliser links, outer tie rod ends, hardware | Measured play on one or two parts, rubber still serviceable |
| Arm level | Control arms with bushings and joints pre-installed, alignment hardware, stretch bolts | Bushing aged or boot breached, or the labour to press parts exceeds the arm price difference [9] |
| Corner level | Arms, joints, inner and outer tie rods, links, strut mounts, rack boots | Both sides at end of life, fleet refresh, or a second repair on the same corner within a short interval |
Arm assembly, pressed bushing, or joint only
There are three routes and the trade-offs are real. Pressing a joint into a healthy arm costs less in parts and preserves an arm whose geometry is known to be correct, but it needs a press, the right cups, and a housing that is not already distorted [9]. Pressing bushings restores the original arm but changes compliance sharply compared with the worn rubber it replaces, which is exactly why an alignment follows [7]. Fitting a complete arm is the fastest route and renews both ends at once; the extra cost buys back labour and removes the risk of a second visit [9].
The failure mode to avoid is the half job: a new joint in a worn arm, or new bushings in an arm whose joint is at its limit. Both produce a car that is better for a month and then worse than before, and both are invisible on an invoice.
The sequence that makes the repair stick
Fitting is only half the work. The order below is what separates a repair that holds its alignment from one that comes back in three weeks:
- Torque the bushings at ride height. Bonded rubber bushings tightened at full droop are preloaded the moment the car lands, which adds a spring force and shifts static camber and toe [7].
- Settle the suspension. A short drive lets new bushings and joints re-seat before anything is measured [7].
- Align with a printout. Toe, camber and caster before and after, with the steering wheel centred during the toe adjustment [6][7]. A typical alignment runs 45 minutes to 1.5 hours and costs roughly US$80–150 depending on market and vehicle [6].
- Calibrate what depends on the geometry. Where lane-keeping or steering-angle sensors sit on the same corner, calibration belongs in the job card, not in a later complaint [8].
- Verify on the road. Centred wheel, no pull, no new noise, and a check of the boot for contact with the knuckle or the axle [9].
By vehicle type
The tests do not change with the badge, but the priorities do. On a high-mileage daily driver, the bushing is usually the deciding factor: if the arm has covered a second set of tyres, the rubber is on its way out and an arm assembly avoids a repeat labour charge [9]. On SUVs and pickups, corrosion decides — a boot that has seen salt fails long before the joint wears, and the arm often has to be replaced because the housing is no longer round [2]. On heavier electric vehicles, the same joints carry more mass and more instant torque, so play appears earlier and the alignment is less forgiving; the inspection interval, not the part number, is what changes. On lowered or lifted cars, geometry correction parts enter the kit because the arms now sit at an angle the factory bushing was never designed to hold [11].
Purchasing checklist for distributors
- Interchange depth, including supersessions. Model year, axle, position, and every superseded OE number, tested against a VIN rather than a catalogue tree.
- Coating stated as a number. E-coat or powder coat is a claim; salt-spray hours and coating thickness are specifications. Ask which one the quotation contains.
- Pre-installed parts verified, not assumed. If the arm ships with the joint and bushing installed, the drawing should state the installation torque and the breakaway check, and the batch record should show it was done.
- Hardware and one-time-use bolts. Stretch bolts are not reusable; a kit that omits them shifts a hidden cost onto the fitter [10][11].
- Kit coverage matched to the platform. A kit is only a labour saving if every part in it fits the same axle; mixed-platform bundles create their own comebacks [12].
- Documentation pack. Installation sequence, ride-height torque note, alignment targets, rejection criteria for the joint and the bushing. This is the same pack that right-to-repair and tender audits now ask for.
- Traceability. Batch or date code on the part and the carton, so a claim ties to a production lot rather than to a photograph.
Hetian has manufactured chassis parts since 1998, operates a 160,000 m² production base, and holds IATF 16949 and CNAS accreditation, with more than 100 patents and exports to over 30 countries. The range covers control arms, ball joints, bushings, stabiliser links, tie rod ends, engine mounts and complete suspension kits. Distributors can request OE interchange files, installation and torque sheets, coating test data and batch traceability records with the quotation.
FAQ
Do I need an alignment after replacing only one ball joint?
Yes, at least a check. Replacing a single joint changes where the knuckle sits, and the opposite side has to be confirmed as well [6]. If no locating component was disturbed and the printout is in spec, the check is cheap insurance rather than a full adjustment.
Can I replace the joint and leave the bushing?
Only if the bushing passes its own test. A bushing that has lost 20% of its stiffness is already due for replacement [1], and pressing a new joint into that arm produces a car that still wanders. If the boot has been breached, assume the joint is contaminated even when play is within limits [2].
Is a whole arm always better than pressing bushings?
No. Pressing bushings is legitimate when the arm is straight, the housing is sound and labour is cheap [9]. The whole arm wins when the joint is also at its limit, when the housing is distorted by corrosion, or when the second labour charge would exceed the price difference.
Why do different sources quote different play limits?
Because they answer different questions. A 0.2 mm backlash figure is a campaign rejection criterion for a specific arm [2]; 3.0 mm is an annual inspection condemnation limit [5]. Use the OEM specification for the vehicle in front of you and record the method used.
How much does the alignment add to the job?
Typically 45 minutes to 1.5 hours and about US$80–150 in the markets surveyed, depending on vehicle complexity [6]. Skipping it risks tyre wear that costs more than the alignment within a few thousand kilometres.
Does a kit replace the need for diagnostics?
No. A kit is a purchasing decision, not a diagnosis. The three tests decide which tier to buy; buying the corner level kit because it is convenient is how good parts get replaced for no reason.
What documentation should come with the parts?
Installation sequence, ride-height torque values, alignment targets, joint and bushing rejection criteria, one-time-use bolt callouts, and batch traceability. Those are the items distributors are now asked to produce in tenders and repair-access audits.
Related Guides
- Aftermarket Control Arm Quality: A Supplier Verification Checklist for Chassis Parts Buyers
- Chassis Noise Diagnosis: How to Identify Worn Control Arms, Ball Joints, Bushings and Links by Sound
- Ball Joint Boot: Cracked Dust Boot Damage, Inspection and Replacement Guide
- Suspension Parts Fitment Check: How to Confirm a Part Before It Ships
- EV Chassis Parts: Battery Weight, Instant Torque and What Changes in the Suspension
- Product category: Control Arms
References
- [1] Model Y Service Manual — Suspension, Tesla, 2025 revision, https://service.tesla.com/docs/ModelY/ServiceManual/2025/en-us/GUID-B9007C58-8E32-477A-9C1E-8A6992CAE5B4.html, accessed 2026-11-12.
- [2] Technical Service Bulletin N-Q-G-045: Lower control arm ball joint inspection, NHTSA, 2018-11-20, https://static.nhtsa.gov/odi/tsbs/2018/MC-10152052-9999.pdf, accessed 2026-11-12.
- [3] Inspection of control arms prior to launch of safety recall 8515G (Mazda CX-9), Mazda North American Operations, 2015-07-28, https://static.nhtsa.gov/odi/rcl/2015/RCMN-15V451-5548.pdf, accessed 2026-11-12.
- [4] HPG 83.2, Chapter 2 — Steering and suspension inspection, California Highway Patrol, https://www.chp.ca.gov/siteassets/policy/hpg/hpg-83.2-ch-2.pdf, accessed 2026-11-12.
- [5] Section 4 — Steering, Vehicle Safety and Inspection Standards, Province of British Columbia, 2025, https://www.vsis.ca/s4-steering.htm, accessed 2026-11-12.
- [6] Wheel Alignment After Ball Joint Replacement: When and Why, Tread & Brake, 2026-04-16, https://treadandbrake.com/wheel-alignment-ball-joint-replacement, accessed 2026-11-12.
- [7] Schedule a Front-End Alignment After Control Arm Replacement: Toe–Camber–Caster Checklist, Car Symptoms, 2026-01-29, https://carsymp.com/suspension-steering/control-arm-replacement/alignment-required-after-control-arm-replacement, accessed 2026-11-12.
- [8] Wheel Alignment After Suspension Repair: DIY Guide, VehicleRuns, 2026-07-18, https://vehicleruns.com/maintenance-repair/suspension-steering/wheel-alignment-suspension-repair/, accessed 2026-11-12.
- [9] How to Replace Ball Joints Without Losing Alignment, Too Fast Auto Parts, 2026-08-31, https://toofastautoparts.ca/blogs/too-fast-blogs/how-to-replace-ball-joints, accessed 2026-11-12.
- [10] ECS Tuning Suspension Refresh Kit — Stage 2 (kit contents), ECS Tuning, https://www.ecstuning.com/b-assembled-by-ecs-parts/ecs-tuning-suspension-refresh-kit-stage-2/191498007/, accessed 2026-11-12.
- [11] Control Arm Refresh Kits — kit levels and contents, Turner Motorsport, https://www.turnermotorsport.com/c-813-bmw-control-arm-refresh-kits, accessed 2026-11-12.
- [12] Complete Front Suspension Refresh Kit: what the kits contain, GarageGist, 2026-09-09, https://garagegist.com/complete-front-suspension-refresh-kit/, accessed 2026-11-12.
Last updated: Nov 12, 2026 · Reviewed by the Hetian engineering team